


Letter posts
The Letters and Diaries page of this web site is used to present images and related transcriptions of letters associated with members of the 15th Battalion. (On the site menu click Archives then Letters and Diaries.) This page presents a list of soldiers. Each soldier post can have one or more letter posts attached to it.
Process overview
Create the soldier post first. Essentially all you have to enter in the soldier post is the soldiers name in the title and his first and last names.
Next create the letter post. Since you have already created the soldier post, you will be able to complete the “related soldier” field. Note that, when you complete the “related soldier” field for the letter post, the corresponding field in the soldier post will be automatically updated.
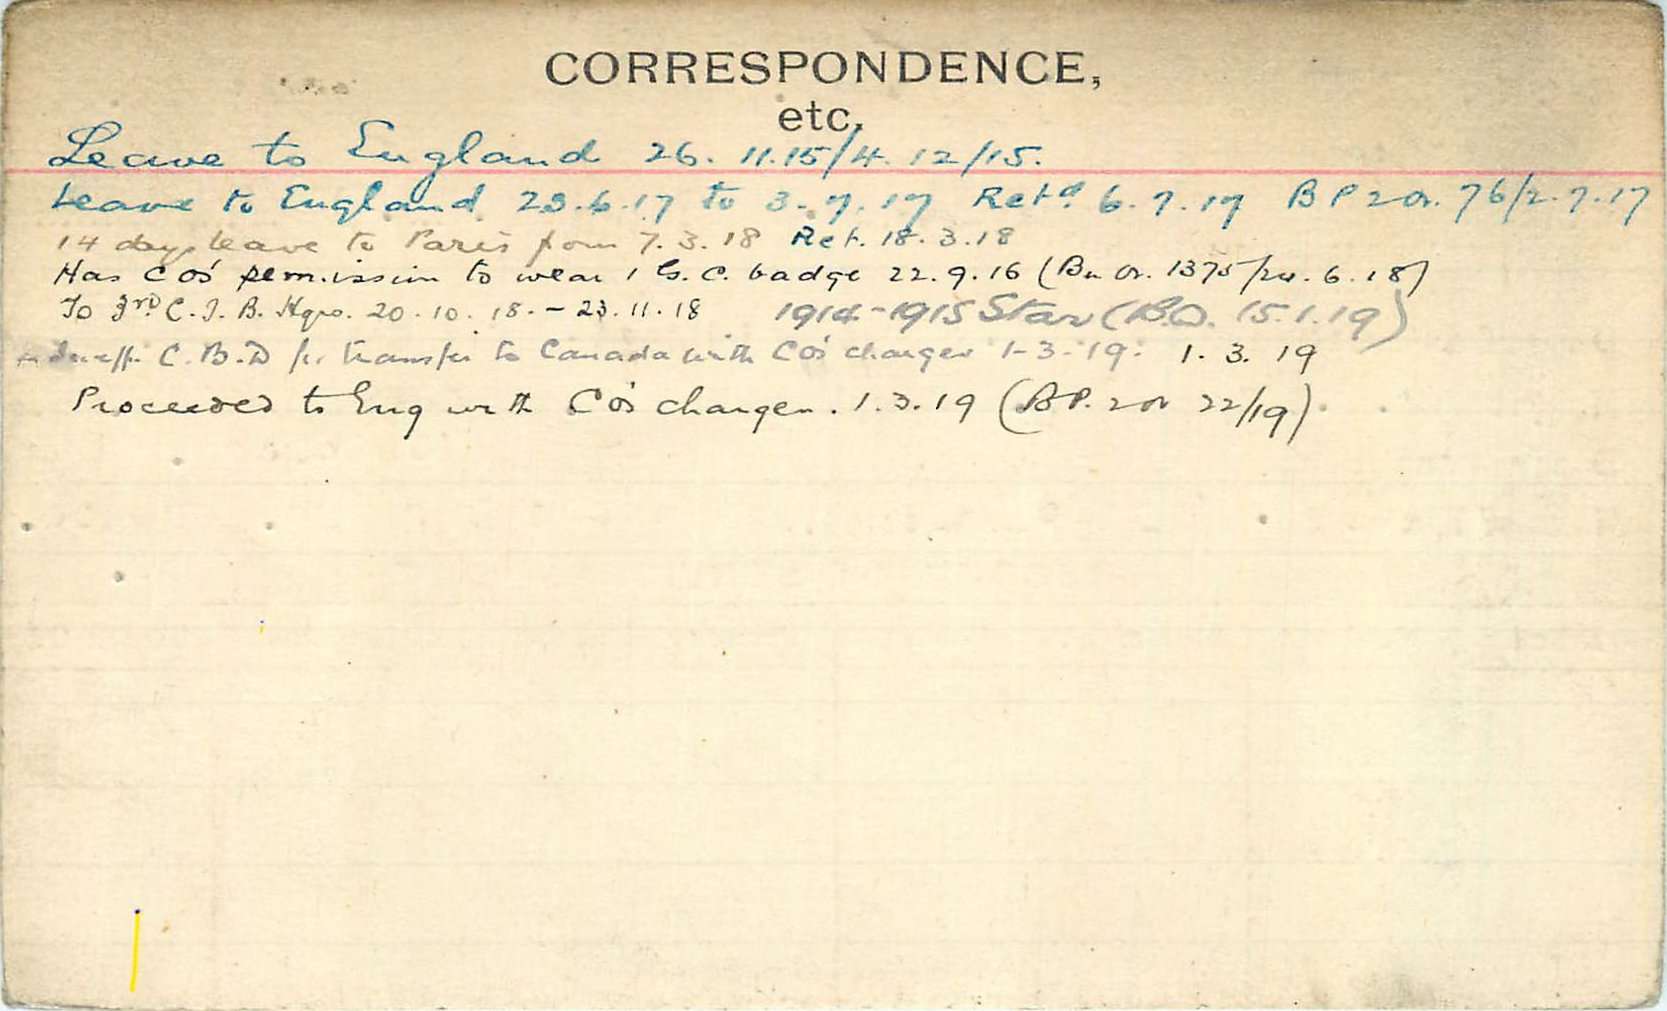
For most letters, the site will present the original scan(s) of the letter and the transcription. The content associated with one letter is entered into a single letter post. There might be several letters associated with any given soldier and, therefore, several letter posts.
Getting started
Before you try to add a “Letter” post, you must prepare the inputs.
Images
The images can be created either by scanning or photographing the originals. The result will be an image in either photographic form (jpg, jpeg, or png) or as a pdf document. However, pdf images cannot be connected to a letter post on this site: they must be converted to a photographic image type.
Once you have all the images for a letter, the file name of the image must be changed to ensure they can be found amongst the thousands of images on this site. Finding images involves searching using various search programs. The file name must include the following information:
- The name of the associated solder. This is required even though the soldier may not have been the author of the letter. Include the service number, rank (abbreviated) and complete first and last names.
- Date of the letter or date unknown.
- Image siffix. If there is more than one image for the letter, each file name MUST end with a dash and a single digit: -1, -2 , etc.
The process for renaming and uploading images has been significantly automated. The only preparation you MUST do is ensure that, for multiple images, each file name ends in a valid suffix: dash follwed by s single digit.
The automated upload process does the following:
- Checks to ensure that, for multiple image uploads, each file name ends in a valid suffix.
- Renames the file in the standatd format:
- Rank (if entered on the upload form)
- First name(s)
- Last names
- Service number (if entered on the upload form)
- “letter”
- Either the date or “unknown date”
- Checks to ensure there are no duplicates already in the library
- Adds the media category “letter images” to each image
- Adds the image)s) to the “Letter images” gallery for the post.
Transcribing the text
Once you have all the images named, you must find a way to create a Word or text file containing the content of the letter. This can be done by:
- reading the images and typing as you read
- dictating the text of the letter or
- submitting the images to some kind of software that can use OCR to extract the text.
Once the transcription / OCR is complete save the text in a Word document or a text (txt) file and perform any edits to ensure accuracy and readability.
Adding to the web site
Start by creating a new “letter” post. After logging in, you are taken to the web site dashboard. On the left hand side of your screen is the admin menu. Look for the “Letters” menu, hover over it and click “Add new letter”. Complete entering data on the screen as follows:
Title
Enter a description of the letter starting with the date it was written. Indicate to whom the letter was written and who wrote the letter.
Date letter was written
You must either enter a date or check “Date of letter unknown” but not both. The date must be in format d mmm yyyy. Use the date picker to ensure the date is in the correct format. Note that you cannot have more than one letter with the same date for any given soldier.
Related soldier
Select the related soldier. In order to do this, the related soldier post must already have been created. Only one linked soldier can be added. Note that, when you create this link, the corresponding link back to this letter post will be created in the soldier post.
Remarks
Include any information relative to the letter. Issues with transcription, where and when published (if applicable) and a link to the site wher the letter has been published.
Images attached?
If you are going to attach any images to this transcribed letter, you MUST check this field. For some letters, we may have only the transcription. In this case, do NOT check this field.
Transcription
Copy and paste the test into the transcription field. Many websites and online tools have their own hidden formats used to make text look a certain way. Many word processors also contain hidden formatting. The hidden formatting of websites and of word processors are different and often don’t work well together. The result of copy and pasting from a word processor to a website may be text that looks weird or break the style of the website. In this case, copy the text in the normal way and then paste it using following key combinations:
-
- Mac: Cmd + Shift + V
- Windows: Ctrl + Shift + V
Make any additional edits to improve formatting and readability.
Letter tags
Adding tags to a letter helps visitors to the site locate this letter. For example, the letter may discuss in detail the writer’s experience at Second Ypres. Since “Second Ypres” would not be mentioned in the letter, visitors to the site will never fid this letter using the search function.
You can add a new tag by simply typing it in the “Letter tags” field. The system will attempt to match what you are typing with an existing tag. For example if you type “Ypres” it will find “Second Ypres”. But if you type “2nd Ypres” it will not find “Second Ypres.” To add a tag that does not already exist simply click the Add button beside the Letter tags field and your tag will be added to the list of available tags.
Try not to enter tags that are duplicates or close duplicates. You can see a list of already entered tags by clicking “letter tags” under the Letters menu on the left side of the screen. You can also see the most used tags by clicking “Choose from the most used letter tags”.
Upload images
This process has been automated. Click the Upload letter images button in the upper right corner of the add/edit screen. Note that this button is disabled unless all required fields have been entered and saved. (See below for Publish and Update instructions.)
When you click the button you are taken to an “Upload letter images” form in a new browser tab. Most of the data on this form are pre-loaded so do not change anything. You can add the rank and service number if you want these to appear in the file name(s).
Select one or more files (no more than 9) and then click the Submit button. Provided there are no issues detected, the images will be saved to the letter post you were working on. Return to the letter post edit screen and refresh it. You can then see the images in the “Letter images” gallery. (The images are already saved.)
To refresh a browser screen, you can either use the refresh button, the F5 key, or a keyboard shortcut. The refresh button, usually a circular arrow, is found near the top of the browser window.
Publish
IMPORTANT: Press the Publish button before leaving this screen. If you fail to do so, you will lose everything you have input. You only have to complete the required fields (marked with a red *) before you press Publish. When you come back to this post, the Publish button will be labeled Update.